SocketCam Custom Views
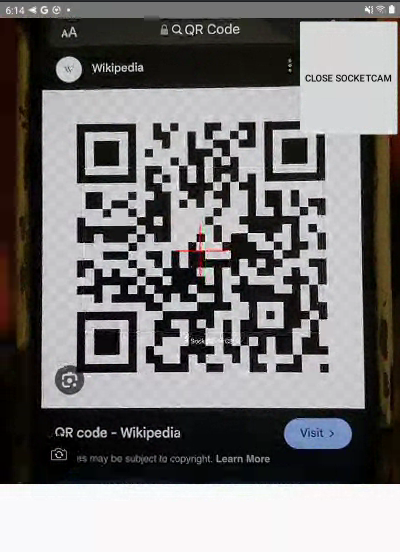
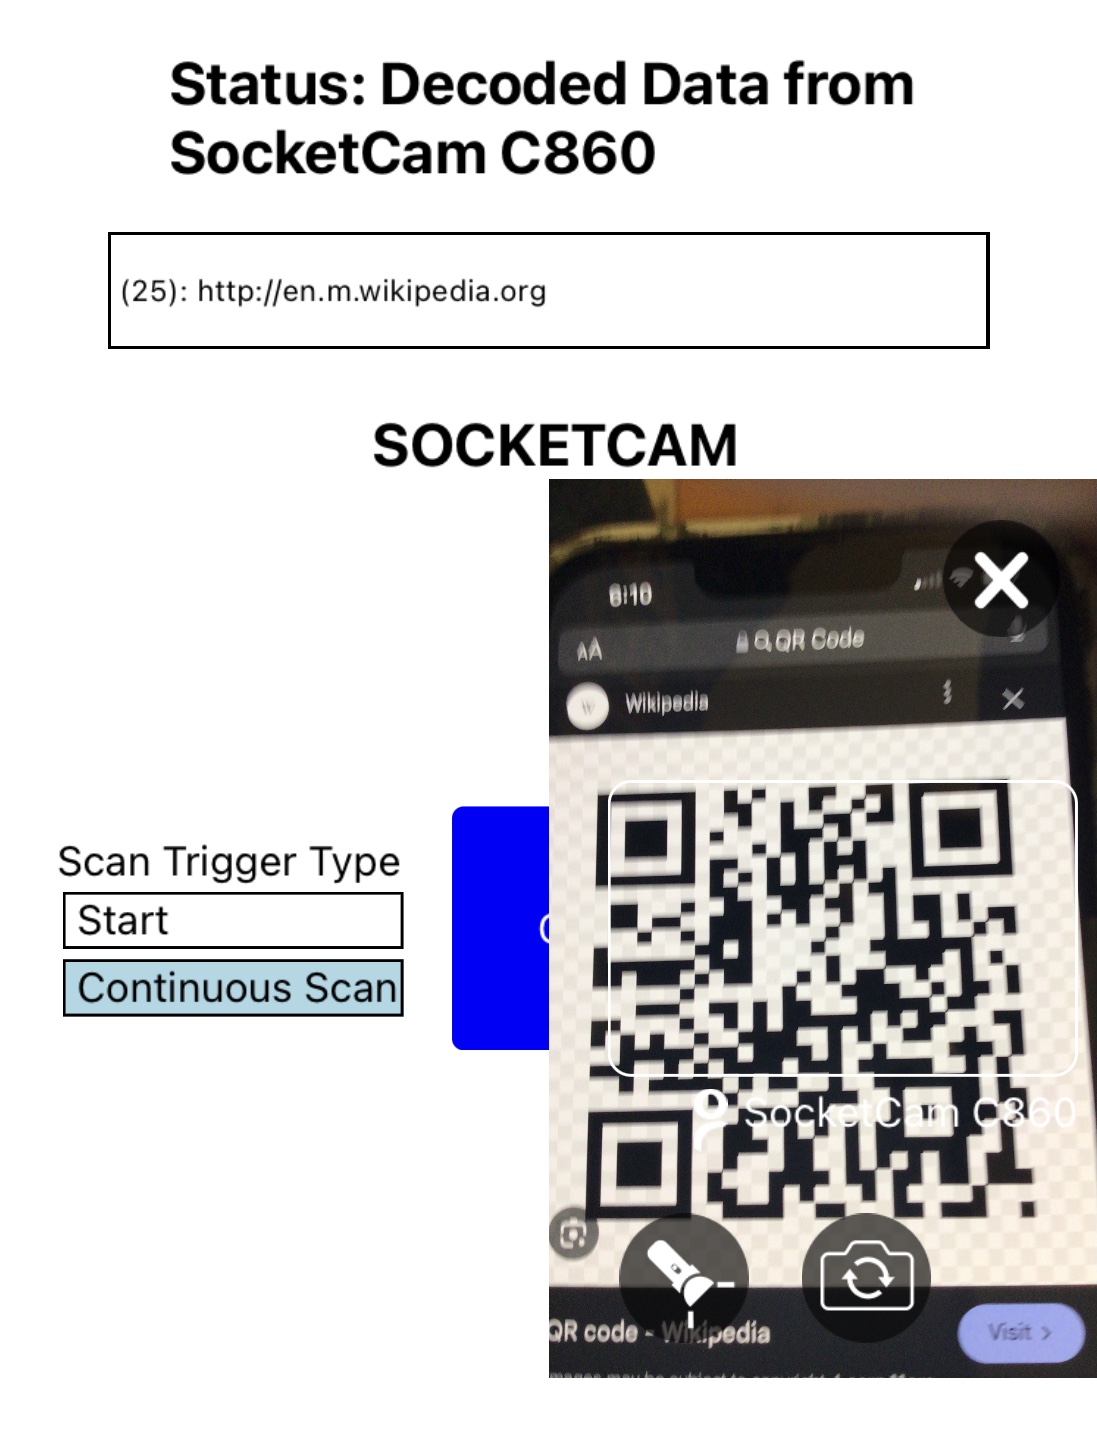
With the new version of the React Native CaptureSDK available, you will be able to present SocketCam as you wish in a custom view if you should choose on both iOS and Android. The implementation is a bit different for each platform, and there’s a minimum size of 250px x 250px to observe in order to display all SocketCam’s UI elements on iOS. On Android, the height is set scale as per the device density, which is 700 dp.
Below is how to incorporate a customized SocketCam view for iOS.
SocketCam Custom (iOS)
For iOS, implementing your custom SocketCam view component can be done by providing values for one of two optional props to the SocketCamViewContainer. If no values are provided for either of these props, the default SocketCam behavior will be used.
The two props in question are socketCamCustomModalStyle and socketCamCustomStyle. See an example below.
<SocketCamViewContainer
    socketCamCustomModalStyle={{
        presentationStyle: 'overFullScreen',
        animationType: 'fade',
        transparent: true,
    }}
    socketCamCustomStyle={SocketCamViewStyles.container}
    {...theRestOfYourProps}
/>
socketCamCustomModalStyle
For socketCamCustomModalStyle, this prop allows you pass an object containing properties for styling a Modal. These options are presentationStyle (info here), animationType (info here), and transparent (info here).
The interface defined for socketCamCustomModalStyle can be seen below.
interface SocketCamModalStyleProps {
    presentationStyle?:
        | 'fullScreen'
        | 'pageSheet'
        | 'formSheet'
        | 'overFullScreen';
    animationType?: 'slide' | 'fade' | 'none';
    transparent?: boolean;
}
socketCamCustomStyle
For socketCamCustomStyle, this prop allows you pass along React Native styles to be applied to the SocketCam view. This prop overrides socketCamCustomModalStyle and provides for more robust customizations. Below is an example of a valid prop that can be passed for socketCamCustomStyle.
<SocketCamViewContainer
    socketCamCustomModalStyle={{
        presentationStyle: 'overFullScreen',
        animationType: 'fade',
        transparent: true,
    }}
    socketCamCustomStyle={SocketCamViewStyles.container} // here is the custom style

    {...theRestOfYourProps}
/>

const SocketCamViewStyles = StyleSheet.create({
    container: {
        backgroundColor: '#FDD7E4',
        alignSelf: 'stretch',
        flex: 1,
        alignItems: 'center',
        width: 200,
        position: 'relative',
        zIndex: 1, // so it doesn't hide dropdown
        elevation: -1, // elevation is zIndex for Android
    },
});
In the above case, the viewfinder for SocketCam on iOS will be encapsulated in a React Native component, which will take on the provided styles specified by container, defined within SocketCamViewStyles.
The interface defined for socketCamCustomStyle is StyleProp<ViewStyle> (more info).
SocketCam Custom (Android)

For Android, implementing the custom view is a bit more complex as it is your responsibility to provide not just a React Native component, but also your own Native UI component and activity. Below is an example of a React Native component that can be used in your project to make a bridge between your React Native app and the Native UI component and activity. We’ll call this file RNSocketCamCustomViewManager.tsx.
import {requireNativeComponent} from 'react-native';

interface RNSocketCamCustomViewProps {
    isScanContinuous: boolean;
}

const RNSocketCamCustomViewManager =
requireNativeComponent<RNSocketCamCustomViewProps>(
    'RNSocketCamCustomViewManager',
);

export default RNSocketCamCustomViewManager;
After creating your React Native component, you can move on to building our your Android custom SocketCam view. Below is an example project structure for how one might incorporate their own Android custom SocketCam view in a React Native app (in this case, named YourRNApp).
YourRNApp/
├── android/
│   ├── app/
│   │   ├── src/
│   │   │    ├── main/
│   │   │    │   ├── java/com/your_rn_app
│   │   │    │   │   │   ├── rn_socket_cam_custom
│   │   │    │   │   │   │   ├── RNSocketCamCustomActivity.kt
│   │   │    │   │   │   │   ├── RNSocketCamCustomPackage.kt
│   │   │    │   │   │   │   ├── RNSocketCamCustomView.kt
│   │   │    │   │   │   ├── RNSocketCamCustomViewManager.kt
│   │   │    │   │   │   ├── RNSocketCamCustomActivity.kt
│   │   │    │   │   ├── MainActivity.kt
│   │   │    │   │   └── MainApplication.kt
│   │   │    │   ├── res
│   │   │    │   │   ├── layout
│   │   │    │   │   │   ├── rn_socket_cam_custom_layout.xml
rn_socket_cam_custom_layout.xml
This layout file will not only serve as your Native UI, but also the entry point for the SocketCamFragment that you will need to insert the SocketCam viewfinder provided by our Android CaptureSDK.
Below is what this file might look like.
<?xml version="1.0" encoding="utf-8"?>
<LinearLayout xmlns:android="http://schemas.android.com/apk/res/android"
android:layout_width="match_parent"
android:layout_height="match_parent"
android:orientation="vertical">

<!-- Fragment container -->

<FrameLayout
    android:id="@+id/fragment_container"
    android:layout_width="match_parent"
    android:layout_height="916dp" >

    <Button
    android:id="@+id/close_socketcam"
    android:layout_width="wrap_content"
    android:layout_height="180dp"
    android:clickable="true"
    android:enabled="true"
    android:focusable="true"
    android:text="@string/close_socketcam"
    android:visibility="visible"
    android:layout_gravity="end"
    android:onClick="removeSocketCamFragment"
    />

</FrameLayout>

</LinearLayout>
MainApplication.kt
Your MainActivity.kt file doesn’t need to be changed, but you will need to add your custom action as a package in MainApplication.kt. You can do this in the getPackages method in your MainApplication.kt file.
override fun getPackages(): List<ReactPackage> {
    // Get the default packages from PackageList
    val packages: MutableList<ReactPackage> = PackageList(this).packages.toMutableList()

    // Add your custom module here
    packages.add(RNSocketCamCustomPackage())

    return packages
  }
RNSocketCamCustomPackage.kt
In this file, you will be able to create your view manager by adding an instance of RNSocketCamCustomViewManager to your createViewManagers method.
See below.
package com.your_rn_app.rn_socket_cam_custom

import com.facebook.react.ReactPackage
import com.facebook.react.bridge.NativeModule
import com.facebook.react.bridge.ReactApplicationContext
import com.facebook.react.uimanager.ViewManager

class RNSocketCamCustomPackage : ReactPackage {
    override fun createNativeModules(reactContext: ReactApplicationContext): List<NativeModule> {
        return listOf()
    }

    override fun createViewManagers(reactContext: ReactApplicationContext): List<ViewManager<*, *>> {
        return listOf(RNSocketCamCustomViewManager())
    }
}
RNSocketCamCustomViewManager.kt
This file is the view manager that can be used to implement your custom view. In this manager you will establish the required props for the custom view as well, isScanContinuous and customViewHandle. isScanContinuous is the prop required to tell SocketCam if it should operate as a continuous trigger or not and is passed by your React Native component. customViewHandle is required but determined and applied on our end, all you need to do is create a prop reference for it.
See below.
package com.your_rn_app.rn_socket_cam_custom

import com.facebook.react.uimanager.SimpleViewManager
import com.facebook.react.uimanager.ThemedReactContext
import com.facebook.react.uimanager.annotations.ReactProp

class RNSocketCamCustomViewManager : SimpleViewManager<RNSocketCamCustomView>() {
    override fun getName() = "RNSocketCamCustomViewManager"

    override fun createViewInstance(reactContext: ThemedReactContext): RNSocketCamCustomView {
        return RNSocketCamCustomView(reactContext, "Your Message Here") // Pass a message if needed
    }

    // Prop for isScanContinuous
    @ReactProp(name = "isScanContinuous")
    fun setIsScanContinuous(view: RNSocketCamCustomView, isScanContinuous: Boolean) {
        view.setIsScanContinuous(isScanContinuous)
    }

    // Prop for customViewHandle
    @ReactProp(name = "customViewHandle")
    fun setCustomViewHandle(view: RNSocketCamCustomView, customViewHandle: Int) {
        view.setCustomViewHandle(customViewHandle)
    }
}
Once you have the custom view manager established, you can create your Android custom view UI component, identified in the RNSocketCamCustomView.kt file of our example.
RNSocketCamCustomView.kt
In this file, you will extend the isScanContinuous and customViewHandle props required by the SocketCamFragment fragment provided by our Android CaptureSDK. This file is also responsible for inflating the layout you defined in rn_socket_cam_custom_layout.xml. Finally, this file will also determine whether or not to start the custom activity your defined in RNSocketCamCustomActivity.kt.
See below.
package com.your_rn_app.rn_socket_cam_custom

import android.content.Context
import android.content.Intent
import android.util.AttributeSet
import android.util.Log
import android.widget.LinearLayout
import com.your_rn_app.R
import com.facebook.react.uimanager.annotations.ReactProp

class RNSocketCamCustomView
@JvmOverloads
constructor(
        context: Context,
        message: String?,
        attrs: AttributeSet? = null,
        defStyleAttr: Int = 0
) : LinearLayout(context, attrs, defStyleAttr) {

    private var customViewHandle: Int = -1
    private var isScanContinuous: Boolean = true
    private var isScanSet: Boolean = false
    private var isCustomHandleSet: Boolean = false

    init {
        inflate(context, R.layout.rn_socket_cam_custom_layout, this) // Inflate the layout
    }

    @ReactProp(name = "isScanContinuous")
    fun setIsScanContinuous(isScanContinuous: Boolean) {
        this.isScanContinuous = isScanContinuous
        this.isScanSet = true
        startSocketCamActivity() // Start the activity when property is set
    }

    @ReactProp(name = "customViewHandle")
    fun setCustomViewHandle(customViewHandle: Int) {
        this.customViewHandle = customViewHandle
        this.isCustomHandleSet = true
        startSocketCamActivity() // Start the activity when property is set
    }

    private fun startSocketCamActivity() {
        if (isScanSet && isCustomHandleSet) {
        val intent =
                Intent(context, RNSocketCamCustomActivity::class.java).apply {
                    putExtra("customViewHandle", customViewHandle)
                    putExtra("isScanContinuous", isScanContinuous)
                }
        context.startActivity(intent) // Start the activity
        } else {
        Log.d("startSocketCamActivity: ", "NOT READY YET")
        }
    }
}
RNSocketCamCustomActivity.kt
Once you’re finished with this file, you can finish the last step: creating your custom activity. This file will extend FragmentActivity, and will also abstract the isScanContinuous and customViewHandle props that were passed along in the Intent. These will be used to instantiate a new SocketCamFragment instance. Once the fragment is created, you can apply the fragment by using supportFragmentManager by providing the new fragment, and the fragment container id defined in rn_socket_cam_custom_layout.xml.
I have also included a removeSocketCamFragment method that will be applied to the button defined in rn_socket_cam_custom_layout.xml responsible for removing the fragment from your app when you’re finished.
See the full activity file below.
package com.your_rn_app.rn_socket_cam_custom
import android.os.Bundle
import android.util.Log
import android.view.View
import androidx.fragment.app.FragmentActivity
import com.your_rn_app.R
import com.socketmobile.capture.socketcam.view.SocketCamFragment

class RNSocketCamCustomActivity : FragmentActivity() {
    override fun onCreate(savedInstanceState: Bundle?) {
        super.onCreate(savedInstanceState)
        setContentView(R.layout.rn_socket_cam_custom_layout) // Ensure this layout contains the fragment_container

        // Retrieve parameters from the intent
        val customViewHandle = intent.getIntExtra("customViewHandle", -1)
        val isScanContinuous = intent.getBooleanExtra("isScanContinuous", true)
        val mySocketCamFragment = SocketCamFragment.newInstance(customViewHandle, isScanContinuous)

        supportFragmentManager.beginTransaction()
        .replace(R.id.fragment_container, mySocketCamFragment)
        .commitAllowingStateLoss()
    }

    public fun removeSocketCamFragment(view: View) {
        Log.d("removeSocketCamFragment: ", "Button clicked, removing fragment and ending activity.")
        finish()
    }
}
Once you have this all set up, all you need to do is pass RNSocketCamCustomViewManager.tsx as the value for the SocketCamViewContainer prop, androidSocketCamCustomView
<SocketCamViewContainer
    androidSocketCamCustomView={
        <RNSocketCamCustomViewManager
            isScanContinuous={triggerType === Trigger.ContinuousScan}
        />
    }
    {...theRestOfYourProps}
/>
